Welcome to the last day of the Rue Blog Hop. I hope you have seen all the great ornaments on Friday, Nov. 8 by Kristen Robinson, Jen Crossley,Cindy Cima Edwards and Cindi Bisson.
Saturday, Nov. 9 was packed full of great bits by Carol la Valley,Lexi Grenzer, Pamela Huntington, Susan Walls and
Jen Cushman.
Today you can find work by Thespa
McLaughlin, Lesley Venable, Jo Mama and Susan Weckesser
For those of you who have been watching my work, you know I'm on this animal kick. I love to cast animals and incorporate them into my work. So when I heard we were doing an ornament, I knew it would have to have some sort of animal. I love finding a sleeping owl nestled in a tree in the middle of the day, so I wanted to bring that feeling into my ornament.
I started by casting an owl with Ice resin.
I Used golden fluid acrylic to color the surface. These add color but allow light to come through
I used the interference blue to add some shimmer to the surface. I then sprayed the piece with a polyurethane clear coat.
Next I drilled a very small hole in the center to the bezel
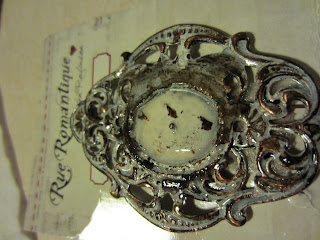
The Rue Romantique bezels are great for adding patina because all the fine detail allows for contrast. I wanted a rustic sort of look, so I painted the entire bezel with white nail polish and allowed it to dry
Once it was completely dry, I rubbed off the highlights with sand paper.
Once I had enough of the polish off, I used the Golden paints to add highlights. You could also use an Ink pad, oil pastels or anything else that adds color!
 |
 I mixed a small amount of Ice Resin and poured a few drops into the bezel. I covered the Resin with some pink glitter because...well who doesn't love glitter?
I took a pre-made flower ribbon and created a wire wrap on each end.
Once my bezel was dry, I drilled a hole on either side and attached the flower ribbon.
I made a loop on the end of my head pin and attached my tassel, and Viola, a sleepy owl to rest in your tree all season long!!Ill probably wear him around my neck after Christmas!!
Happy Blog hopping


Super cool! Love the cast owl!
ReplyDeleteI just bought some silicone molds on Friday. Next time I pour Ice Resin I am going to cast something. Thanks for the inspiration!
ReplyDeletecool
ReplyDeleteWhat a darling little owl!
ReplyDeleteGreat! Love the casted owl and how you used the bezel as a horizontal base!
ReplyDeleteFeliz! It is a unique idea Sandy!
ReplyDeleteWhat a cool and unique ornament!! I love it!! I had an aunt that loved owls so they bring back good memories whenever I see one!!! *Love you Aunt Dot* TFS!
ReplyDeleteSandy.. what a fabulous piece.. love the owl... and the way you set it on the bezel.. very cool!!
ReplyDeleteOh goodness gracious Sandy!! This ornament is simply faaaaaaabulous! I love every bit of it!!
ReplyDelete